What is “Show Map in Location Alerts” on iPhone?
The iPhone is known for its seamless integration of hardware and software to enhance user experience, and location-based services are a significant part of this. One such feature is the “Show Map in Location Alerts,” which adds an extra layer of convenience when receiving notifications tied to your location. In this article, we’ll explore what this feature does, how it works and how to manage it on your device.
1. What Does “Show Map in Location Alerts” on iPhone Mean?
“Show Map in Location Alerts” is a feature that displays a small, interactive map in notifications triggered by location-based alerts. When apps or services need to send you notifications that rely on your geographical position, such as reminders, calendar events, or location-sharing alerts, they may include a map to help you better visualize your position or the location related to the alert.
For instance, if you have set a reminder in the Reminders app to “Pick up laundry” when you arrive at the dry cleaner’s, you’ll get an alert that includes a tiny map revealing where the dry cleaner is. This adds context to your notifications and helps you navigate to your destination quickly without opening a dedicated map app.
2. How Does “Show Map in Location Alerts” Function?
This feature is integrated into iOS’s location services, using your iPhone’s GPS and the Apple Maps application to provide the visual data. When a location alert is triggered, the operating system pulls your current position or the location tied to the notification and generates a mini-map inside the alert.
Common scenarios where this feature is used include:
- Reminders: Set a task or reminder for a specific location. The alert will include a map to show you where you need to go.
- Find My: When location-sharing notifications are triggered, a map is displayed in the alert to show where the person or device is located.
- Calendar Events: Calendar notifications tied to a specific place can include a map to help you find the event’s location quickly.
3. How to Manage Location Alerts and Maps in Notifications?
You can manage your location settings and control whether apps show maps in notifications by adjusting permissions in Settings. Here’s how to customize location services and alerts on your iPhone:
Location Services:
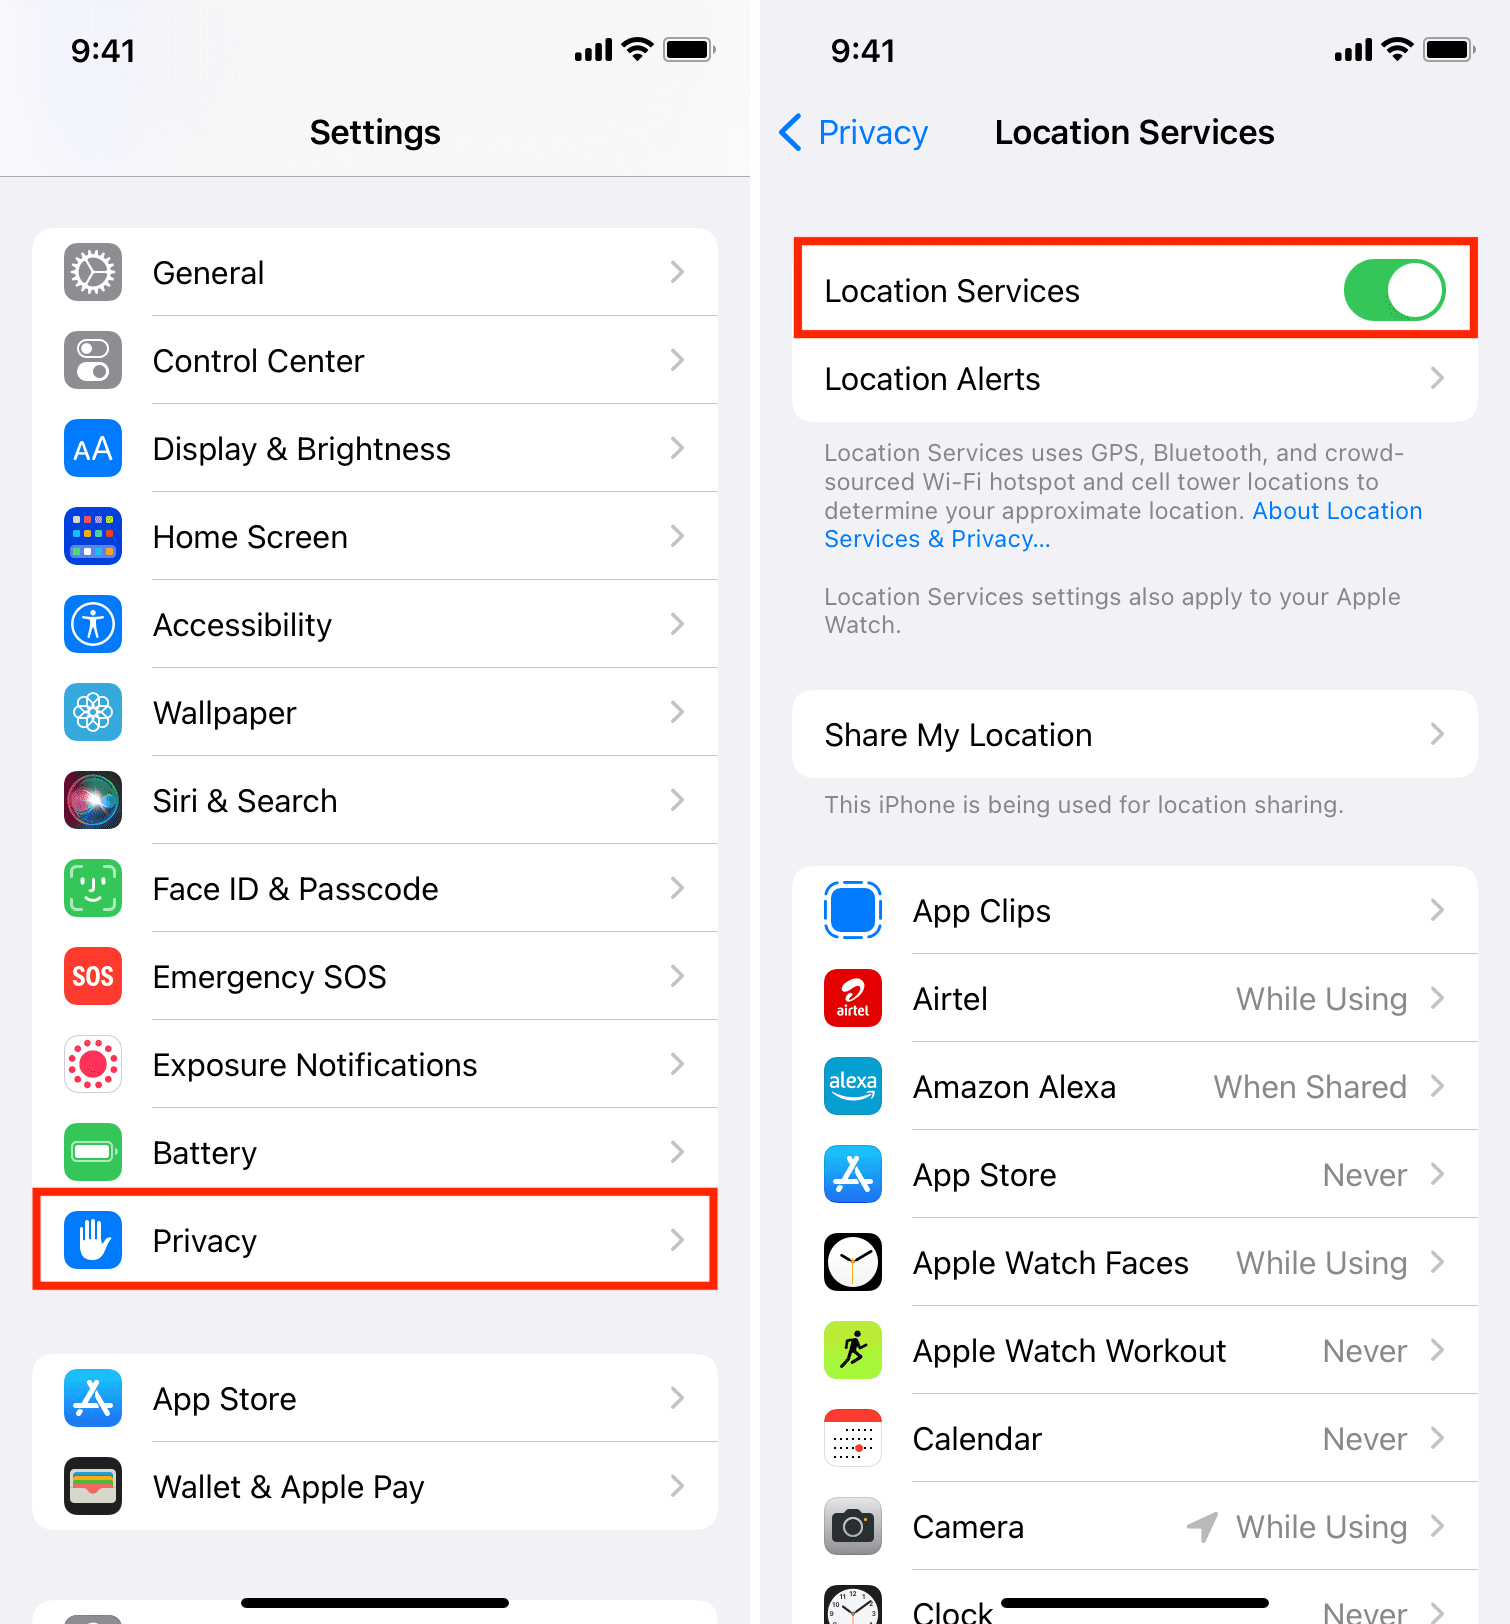
- To access location services, go to Settings > Privacy & Security > Location Services on your device.
- Toggle Location Services on or off, or adjust permissions for specific apps.
- You have the option to select “Always,” “While Using the App,” or “Never” to regulate the times when apps can access your location.
Notification Settings:
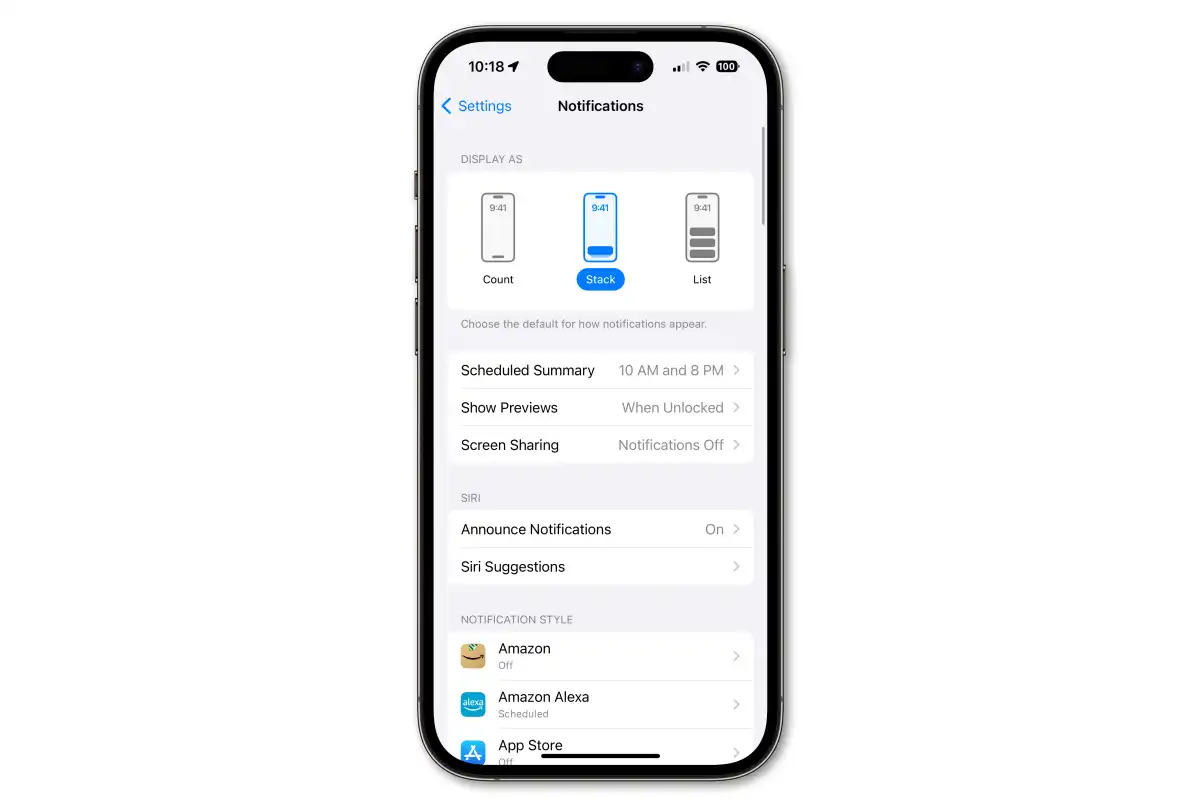
- To control how notifications, including location-based ones, appear, go to Settings > Notifications.
- Choose an app, then customize how the notifications are displayed (e.g., banners, lock screen, or sounds).
- For apps like Reminders or Calendar that use location alerts, you can modify how these notifications appear and whether they include sound or haptic feedback.
App-Specific Settings:
Some apps may have their own settings for managing location alerts. For example, within the Reminders app, you can set specific tasks to trigger notifications when you arrive at or leave a location.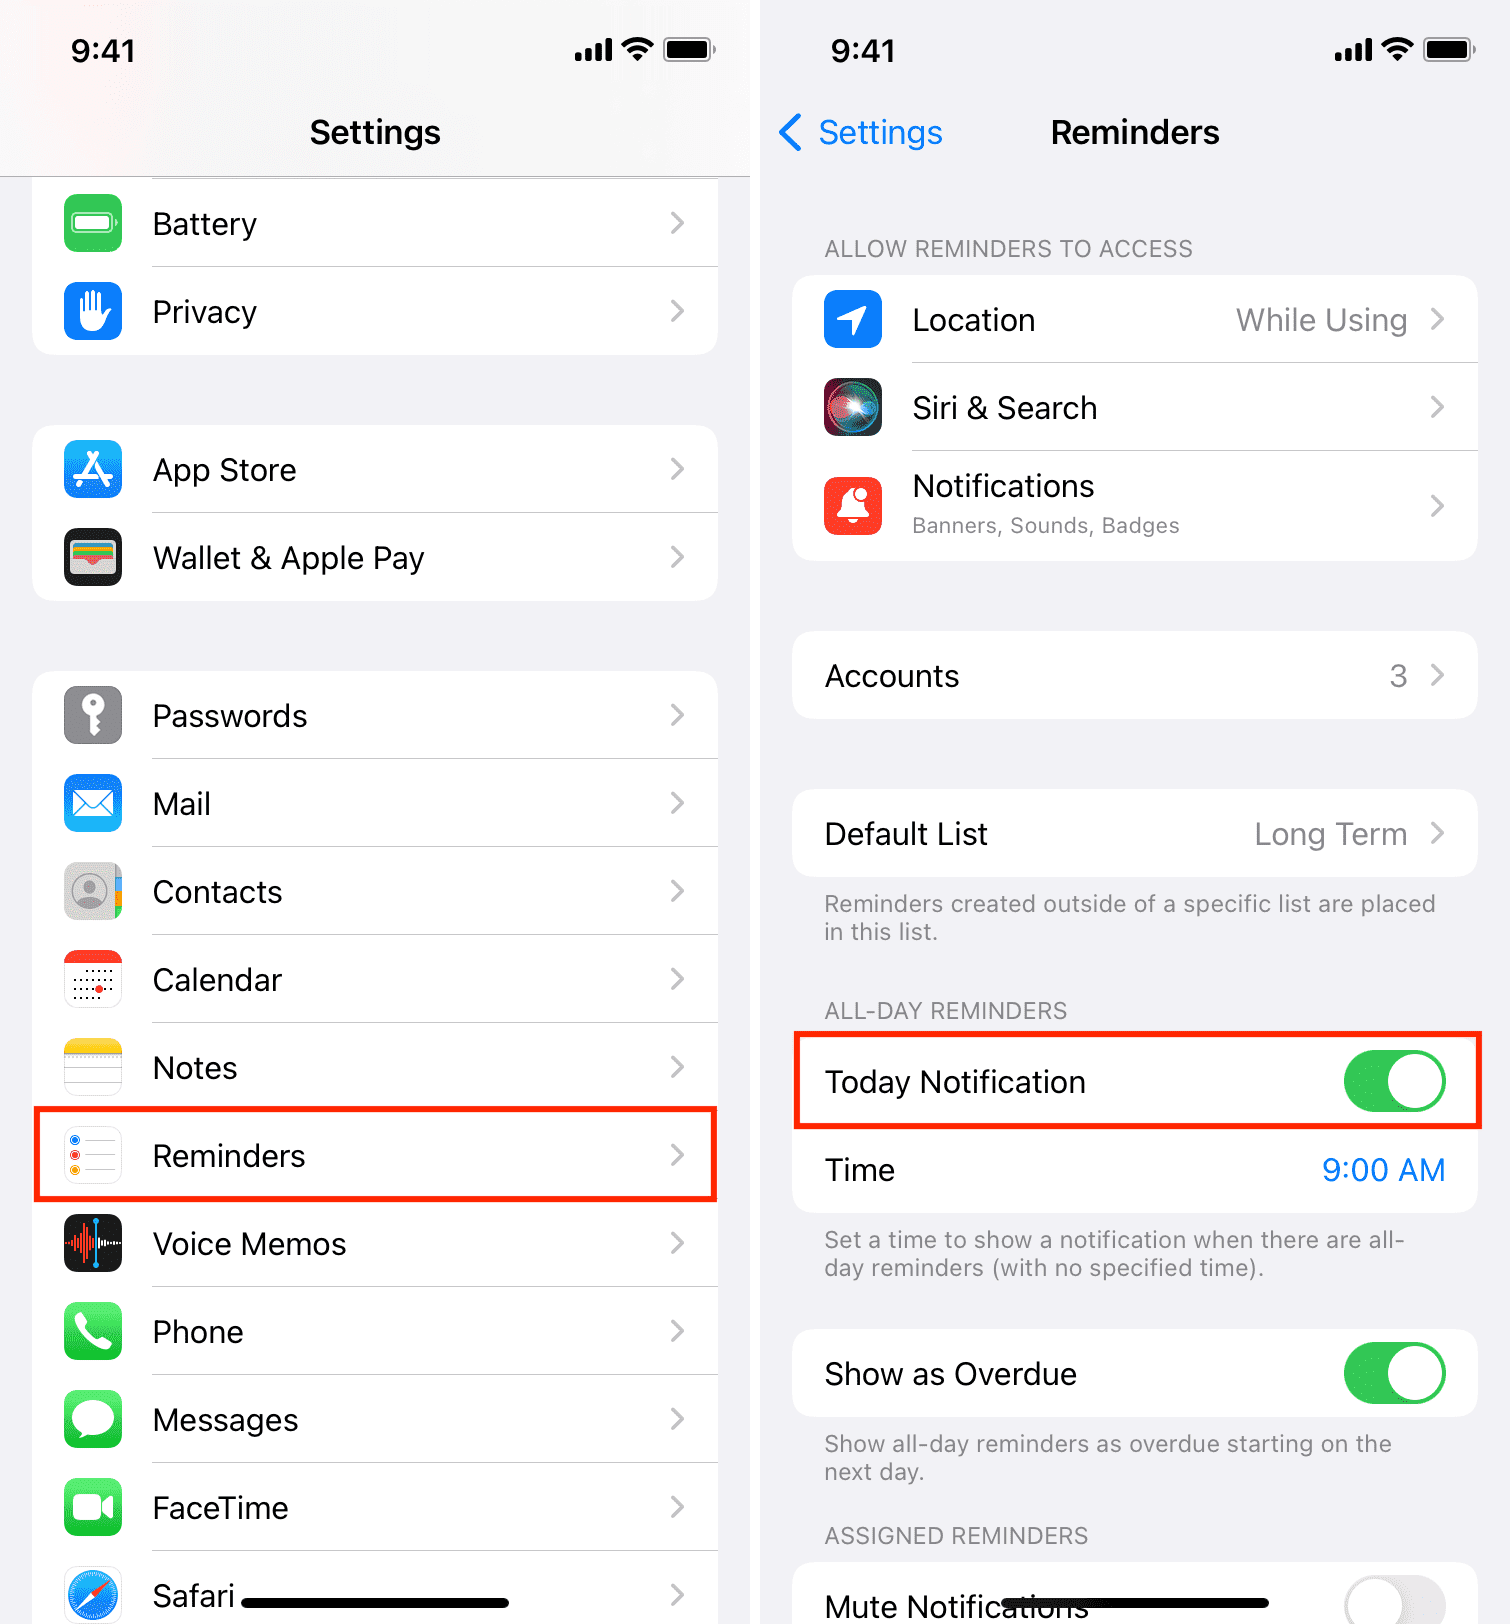
4. How to Turn Off Show Map in Location Alerts
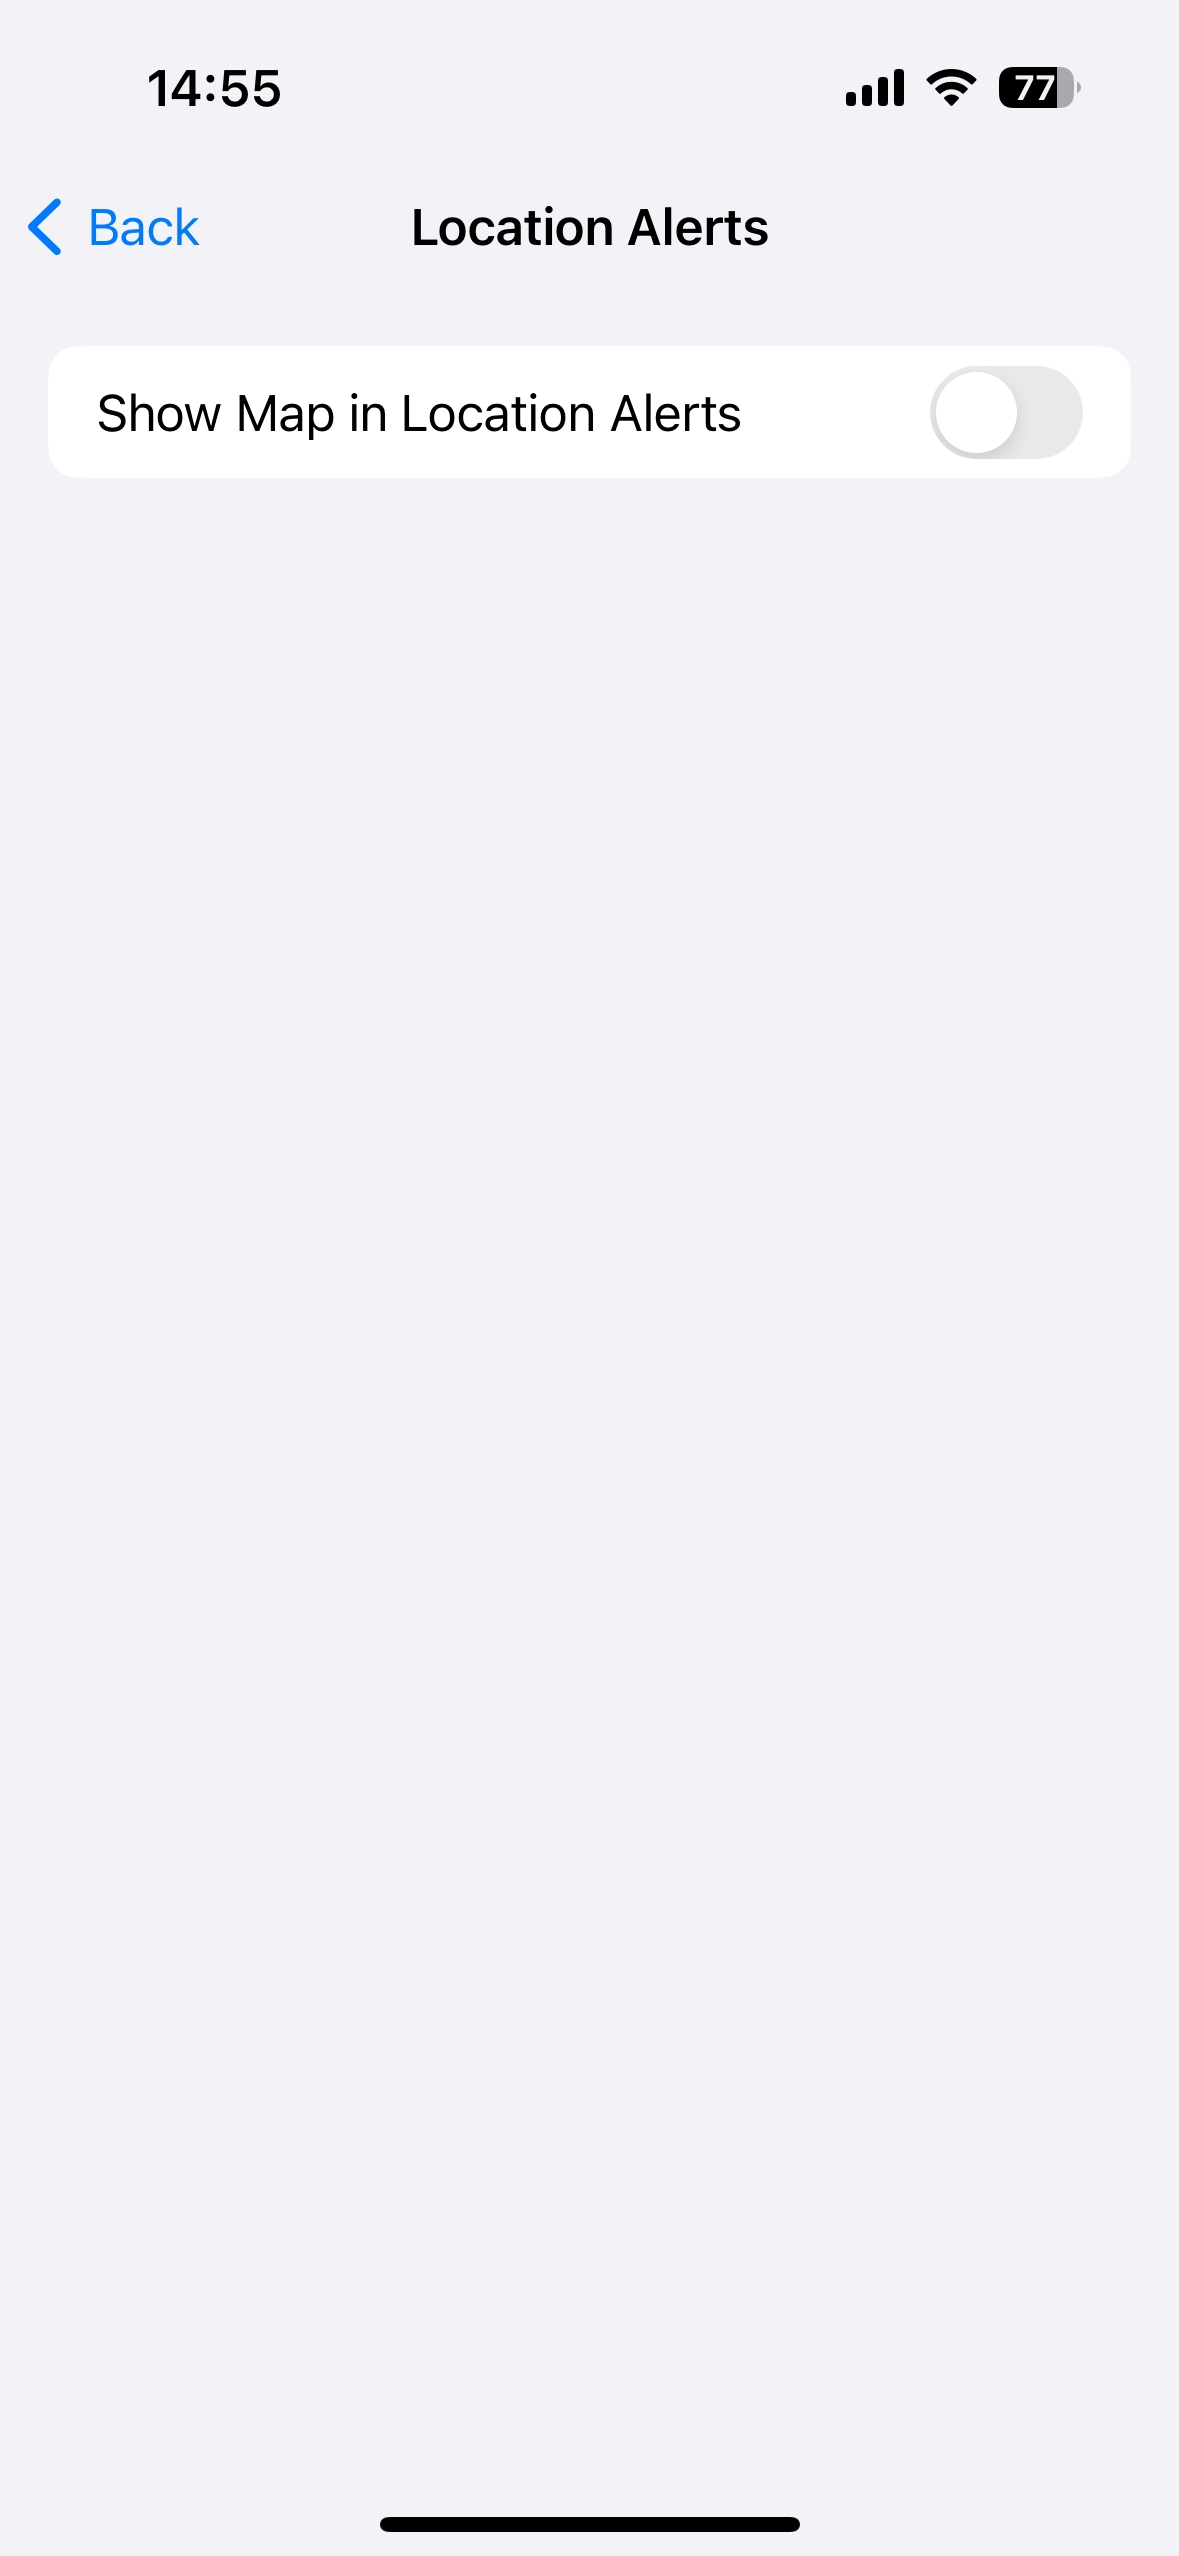
If you’d rather not see maps in your location alerts, you can turn off the feature by going to Settings > Privacy & Security > Location Services > Location Alerts > Disable Show Map in Location Alerts.
5. Bonus: Spoof Your iPhone’s Location with AimerLab MobiGo
While location-based features on the iPhone are useful, there are times when you may want to spoof (fake) your iPhone’s location. AimerLab MobiGo is a professional iPhone location spoofer that lets you change your iPhone’s GPS location to anywhere in the world. Whether you’re a developer needing to test how apps behave in different locations, or a casual user looking to access services restricted to certain regions, MobiGo provides an easy solution.
Spoofing your iPhone location with AimerLab MobiGo is simple, and the steps are as follows:
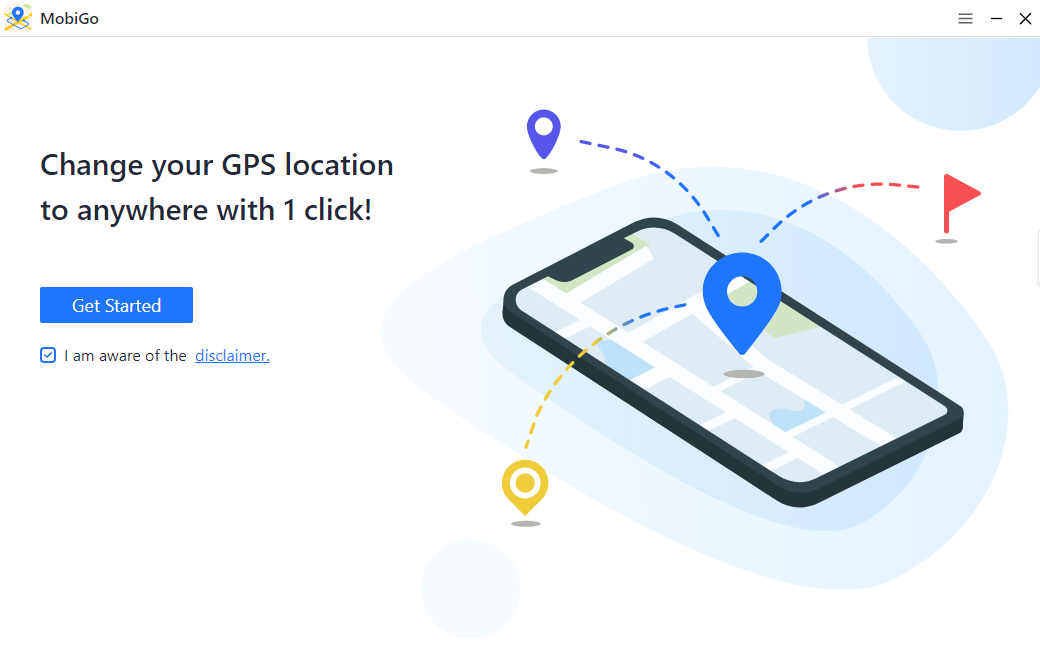
Step 1: Download and install the MobiGo software for your computer (available for both Mac and Windows), then launch it.Step 2: Start using AimerLab MobiGo by clicking the “Get Started” button on the main screen. After that, just connect your iPhone to your computer with a USB cable, and MobiGo will find your iPhone automatically.
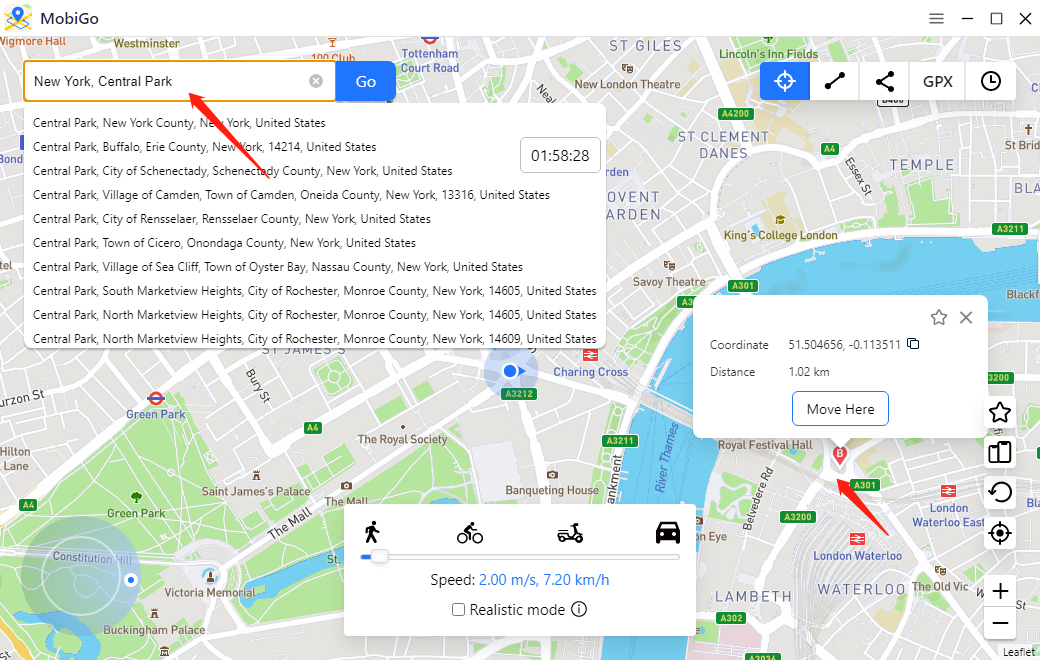
Step 3: A map will appear on the MobiGo interface, then you can use the search bar to enter the name or coordinates of the location you want to spoof.
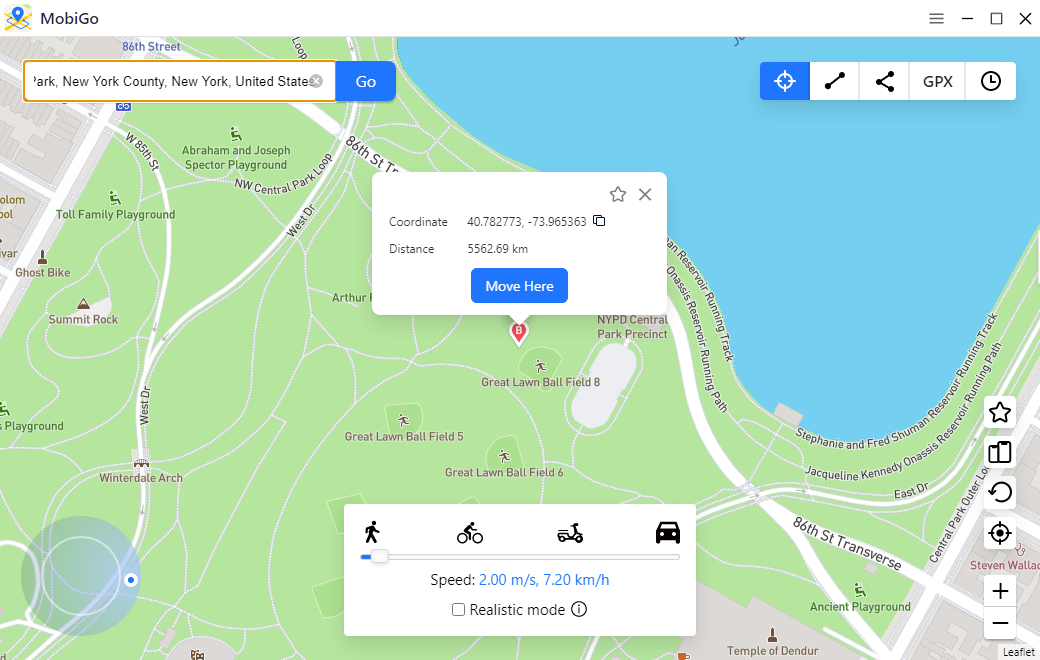
Step 4: After selecting the desired location, click on Move Here to instantly teleport your iPhone’s GPS to that spot. Once the location is spoofed, open any app on your iPhone that uses location services (like Maps or Pokémon GO), and it will now display your spoofed location.
6. Conclusion
The “Show Map in Location Alerts” feature on iPhone enhances the user experience by embedding maps directly in location-based notifications. This helps users quickly visualize their geographic context without opening a separate app. For those who want more control over their location, whether for testing purposes or privacy concerns, AimerLab MobiGo provides an easy and efficient solution to spoof iPhone locations without jailbreaking. By combining iOS’s built-in location features with tools like MobiGo, users can navigate their digital world with greater flexibility and control.
- Meet iPhone 16/16 Pro Max Touch Screen Issues? Try These Methods
- Why Does My iPhone Screen Keep Dimming?
- iPhone Keeps Disconnecting from WiFi? Try These Solutions
- Methods for Tracking Location on a Verizon iPhone 15 Max
- Why Can’t I See My Child’s Location on iPhone?
- How to Fix iPhone 16/16 Pro Stuck on Hello Screen?


