How do I Follow a Route in Pokemon Go?
Pokémon GO has taken the world by storm, transforming our surroundings into a captivating playground for Pokémon trainers. One of the fundamental skills every aspiring Pokémon master must learn is how to follow a route effectively. Whether you’re chasing down rare Pokémon, completing research tasks, or participating in community events, knowing how to navigate and follow a route is crucial. In this comprehensive guide, we’ll walk you through the steps to master the art of following a route in Pokémon GO.
1. How to Make a Route in Pokemon Go?
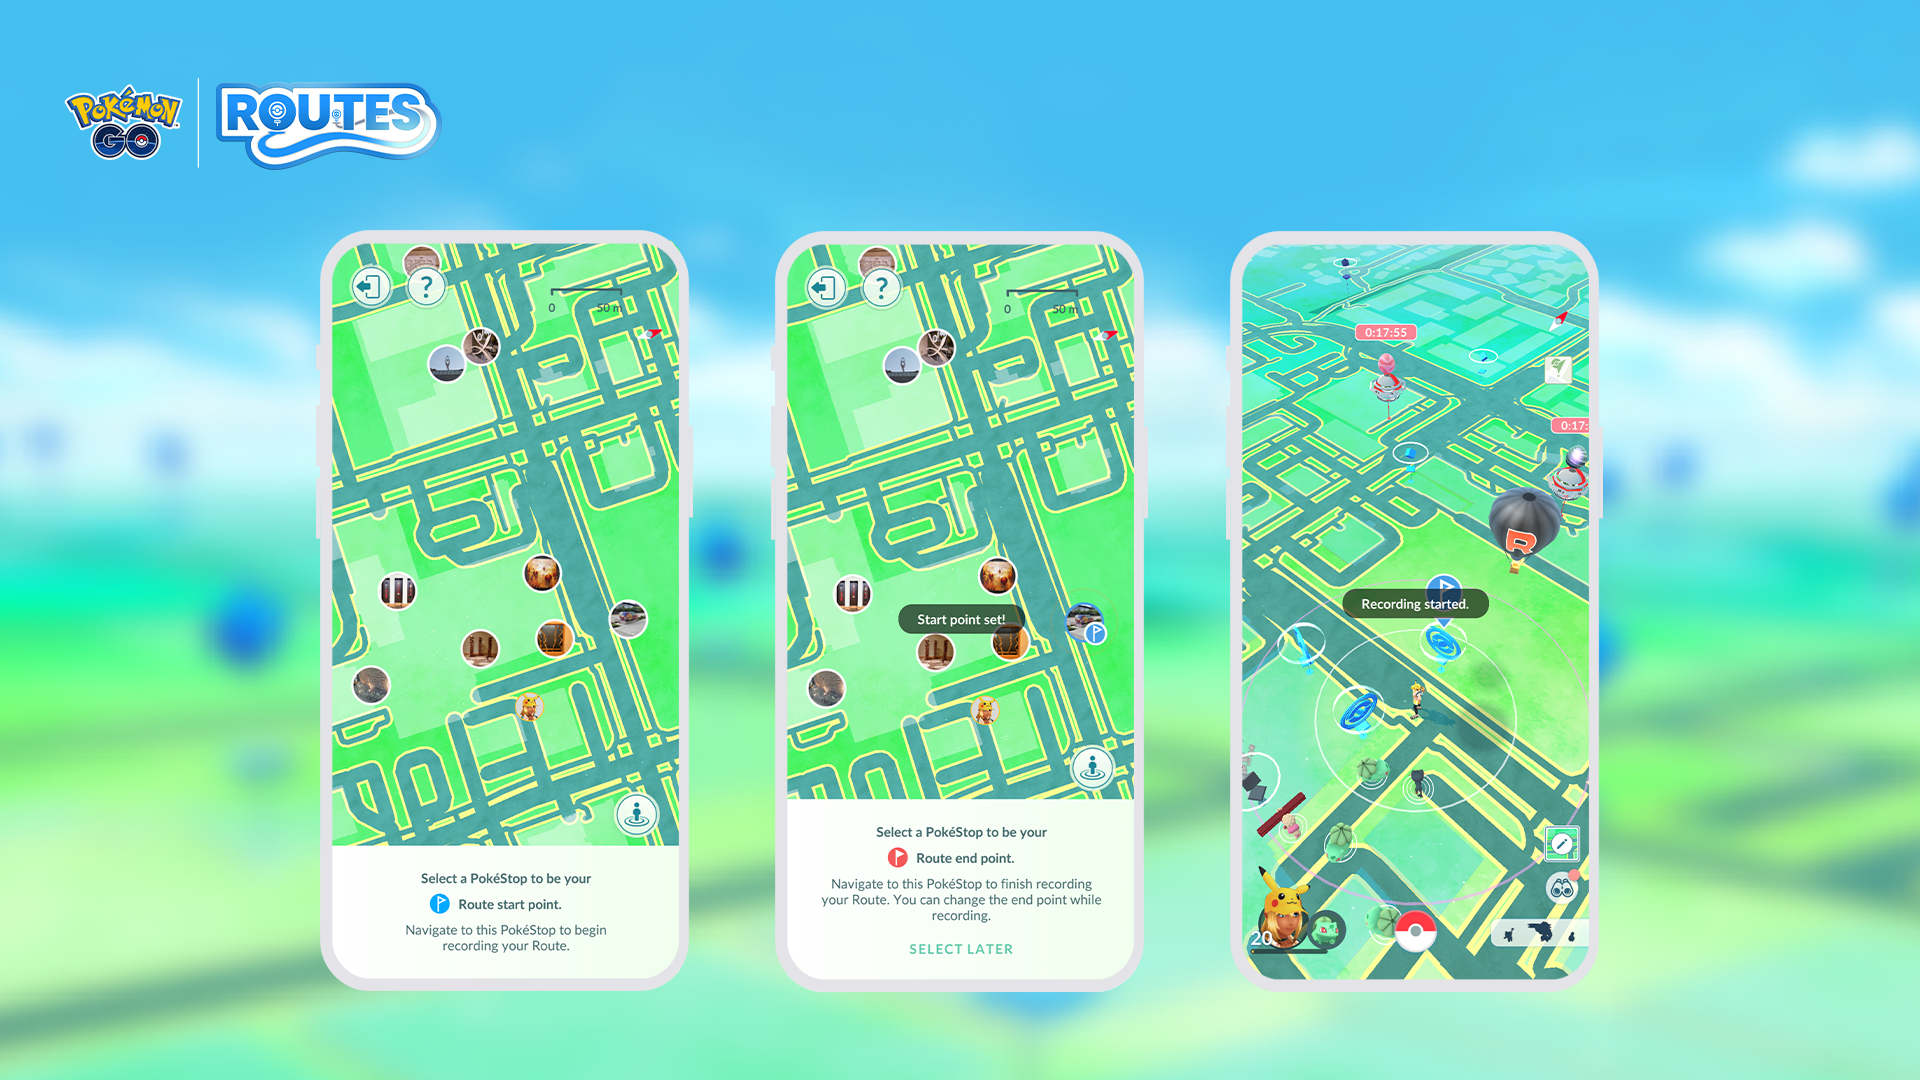
Creating a route in Pokémon GO adds an exciting layer of exploration and engagement to your gameplay. This feature allows you to guide fellow trainers through a specific journey, highlighting noteworthy PokéStops and Gyms. Here’s a step-by-step guide on how to make a route:
Step 1: Select Your Starting Point Begin by choosing a prominent PokéStop or Gym that will serve as the starting point for your route. This location should be easily accessible and relevant to your intended adventure. It could be a bustling city square, a serene park, or any place with interesting in-game features.
Step 2: Record Your Route: Once you’ve identified your starting point, tap the “record” option in Pokémon GO to initiate the process of mapping your route. This feature allows you to track your movements and pin essential stops along the way. As you progress, your route will take shape on the map, creating a clear path for others to follow.
Step 3: Provide Route Information: Before finalizing your route, add valuable information to make it enticing and informative. You can include details such as the route’s name, a brief description of what trainers can expect, and any tips or recommendations for a successful journey. This information helps prospective followers understand the route’s purpose and potential rewards.
After inputting the necessary information, submit your route for review by Niantic. The review process ensures that your route adheres to community guidelines and enhances the overall Pokémon GO experience.
Step 4: Sharing Your Route: Once your route is approved, it becomes accessible to trainers in your area. They can discover and follow your route, benefiting from your insights and discoveries. Routes can serve various purposes, whether it’s guiding trainers to a collection of rare Pokémon, the best PokéStops for items, or a picturesque walking tour of a local park. As trainers embark on your route, they can engage with the game more strategically, enjoying a curated adventure that aligns with their goals and interests.
2. How to Follow a Route in Pokemon Go?
These user-created routes can lead you to exciting places and help you make the most of your in-game journey. Here’s a step-by-step guide on how to explore a route:
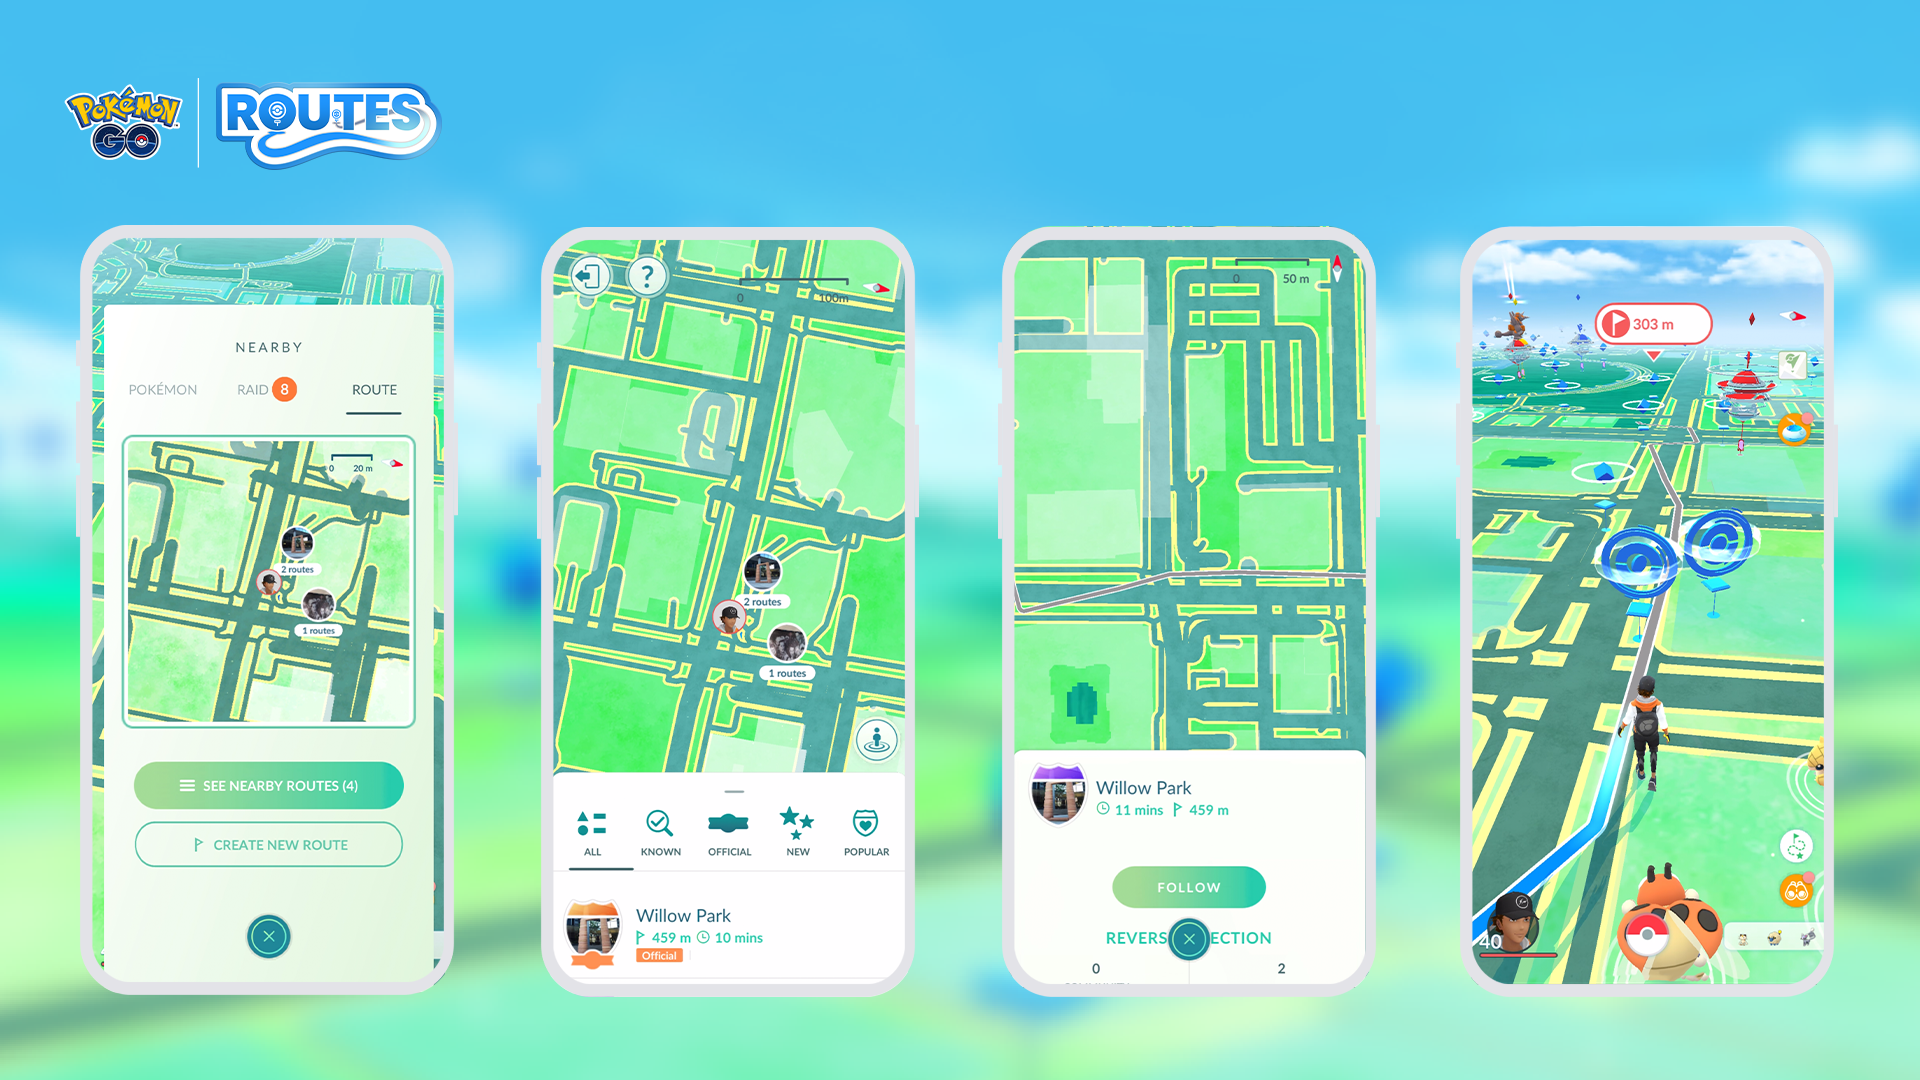
Step 1: Access the Route Tab: To embark on a route-fueled adventure, begin by opening the Pokémon GO app and accessing the “Nearby” menu. In this menu, you’ll find a dedicated “Route” tab, which is your gateway to discovering local routes crafted by fellow trainers.
Step 2: Browse and Choose: Once you’re in the Route tab, you’ll be presented with a selection of local routes created by other trainers in your area. Each route may have a distinct theme, purpose, or destination, so take your time to explore the available options. You might find routes focused on rare Pokémon spawns, scenic locations, or historical landmarks.
Browse through the routes until you find one that piques your interest or aligns with your gaming goals. Routes often come with brief descriptions that provide insights into what you can expect during your journey.
Step 3: Embark on the Adventure: After selecting a route that catches your eye, it’s time to embark on your Pokémon GO adventure. Simply tap on the chosen route to initiate it. This action will set your course, guiding you through a predetermined path filled with PokéStops, Gyms, and potential encounters with wild Pokémon. As you follow the route, you’ll have the opportunity to explore new areas, collect items from PokéStops, and engage with the Pokémon GO community.
3. Bonus: Change Your Location to Anywhere & Customize Routes in Pokemon Go
Sometimes you may want to explore different locations or create personalized routes for a unique gaming adventure, in this situation AimerLab MobiGo is a good tool for you. AimerLab MobiGo is a professional location spoofer that can change your location to anywhere in all LBS apps including Pokemon Go, Find My, Life360, Tinder, etc. With MobiGo you can easily teleport to the start point of a Pokemon Go route or create a customized movement between two or more spots.
Here are the steps on how to spoof location in Pokemon Go with MobiGo:
Step 1: Install and start AimerLab MobiGo on your computer, then click “Get Started” to begin faking your location.
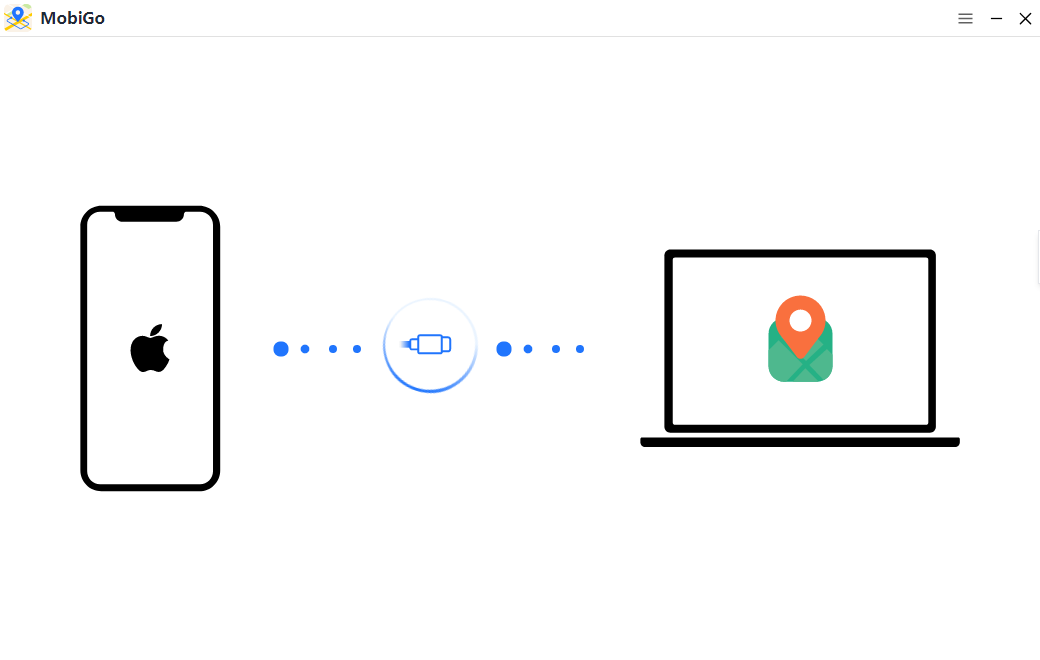
Step 2: Connect your iOS device to your computer using a USB cable, and make sure to enable “Developer Mode” on your device.
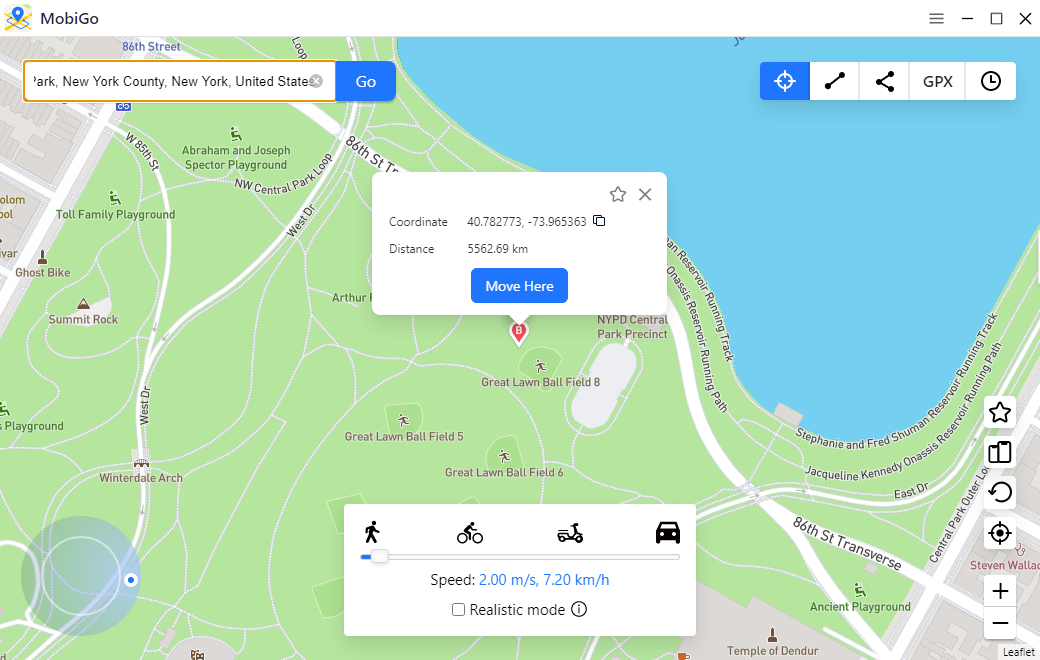
Step 3: In the MobiGo interface, select the “Teleport Mode” option which will allow you to change your location freely. You can enter the location you want to spoof in the search bar or click on the map to choose a location.
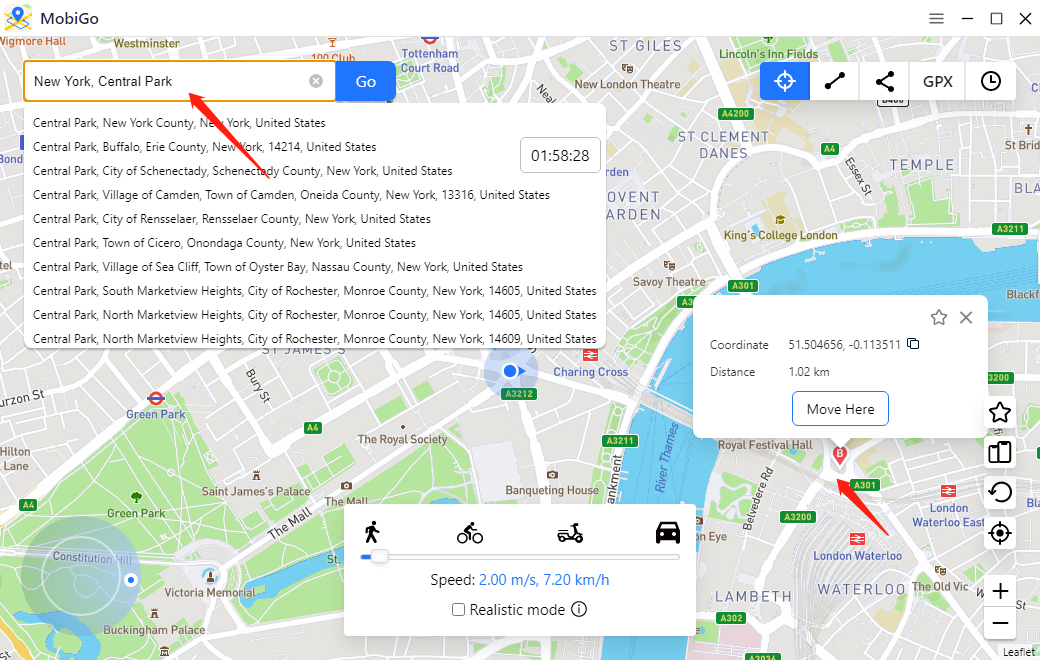
Step 4: Click the “Move Here” button, and MobiGo will teleport your device to the selected location. Your Pokémon GO app will now reflect this new location.
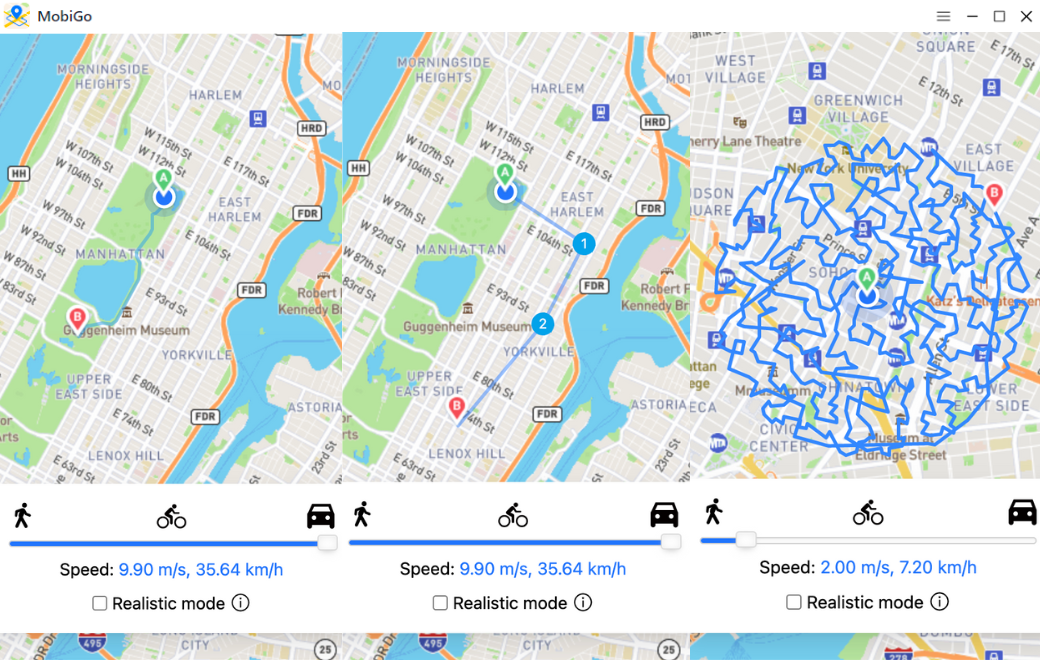
Step 5: By clicking on “One-Stop Mode” or “Multi-Stop Mode“, you will be able to create a customized route for your Pokémon GO adventure. You can also import a GPX to simulate a same route as you want.
4. Conclusion
Creatinng and following a route in Pokémon GO is both a skill and an adventure. After reading this article, you can master the basics, utilize in-game tools, embark on unforgettable journeys and become a true Pokémon master. Besides, you can also use AimerLab MobiGo to change your location to virtually anywhere in the world and customize routes to enhance your Pokémon GO gameplay, suggest downloading and giving it a try.
- Methods for Tracking Location on a Verizon iPhone 15 Max
- Why Can’t I See My Child’s Location on iPhone?
- How to Fix iPhone 16/16 Pro Stuck on Hello Screen?
- How to Resolve Work Location Tag Not Working in iOS 18 Weather?
- Why My iPhone Is Stuck on the White Screen and How to Fix It?
- Solutions to Fix RCS Not Working on iOS 18


