How to Fix My iPhone Stuck in Swipe Up to Recover?
iPhones are known for their seamless user experience and reliability. But, like any other device, they may have some issues. One frustrating problem that some users face is getting stuck on the “Swipe Up to Recover” screen. This issue can be particularly alarming because it seems to leave your device in a non-functional state, with limited options for recovery. In this article, we will explore why your iPhone might be stuck in “Swipe Up to Recover” mode and provide a step-by-step guide on how to resolve the issue.
1. Why Is My iPhone Stuck in Swipe Up to Recover?
The “Swipe Up to Recover” screen typically appears after an iPhone has encountered a serious software issue. This mode is designed to help you recover your device, but sometimes it can become stuck, making it difficult to proceed with the recovery process. There are several reasons why your iPhone might get stuck in this mode:
- Incomplete iOS Update: One of the most common reasons for this issue is an incomplete or failed iOS update. If your iPhone was updating its operating system and the process was interrupted (e.g., due to a low battery or network issues), it might get stuck in recovery mode.
- Software Glitches: iPhones are sophisticated devices, but they are not immune to software glitches. A bug or glitch in the operating system can sometimes cause the device to enter recovery mode unexpectedly and get stuck there.
- Corrupted Files: Corrupted system files or data can also lead to the “Swipe Up to Recover” issue. This can happen if there was an error during data transfer or if the files became corrupted during an update.
- Jailbreaking: If you have attempted to jailbreak your iPhone, the process could have gone wrong, resulting in your device being stuck in recovery mode. Jailbreaking can make your iPhone more vulnerable to software issues.
- Hardware Issues: Although less common, hardware issues such as a faulty battery or damaged components can also cause your iPhone to get stuck in recovery mode.
2. How to Resolve My iPhone Stuck in Swipe Up to Recover
If your iPhone is stuck on the “Swipe Up to Recover” screen, there are several methods you can try to resolve the issue.
2.1 Force Restart Your iPhone
A force restart can sometimes resolve minor software issues and get your iPhone out of recovery mode.
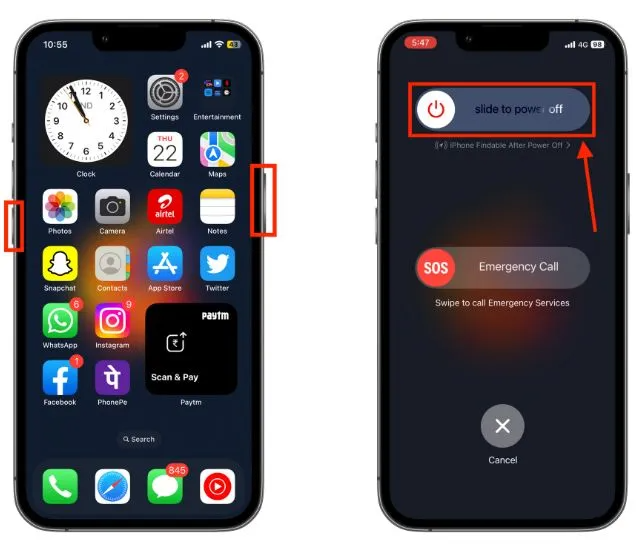
2.2 Use iTunes or Finder to Restore Your iPhone
If a force restart doesn’t work, you can try restoring your iPhone using iTunes (on Windows or macOS Mojave and earlier) or Finder (on macOS Catalina and later). This operation will delete all data on your iPhone, so make a backup before beginning.
Connect your iPhone to your PC with a USB connection, then select your iPhone by opening the Finder or iTunes. Next, choose “Restore iPhone” and follow the steps on the screen. When the restore procedure is complete, your iPhone will restart, allowing you to set it up as new or restore from a backup.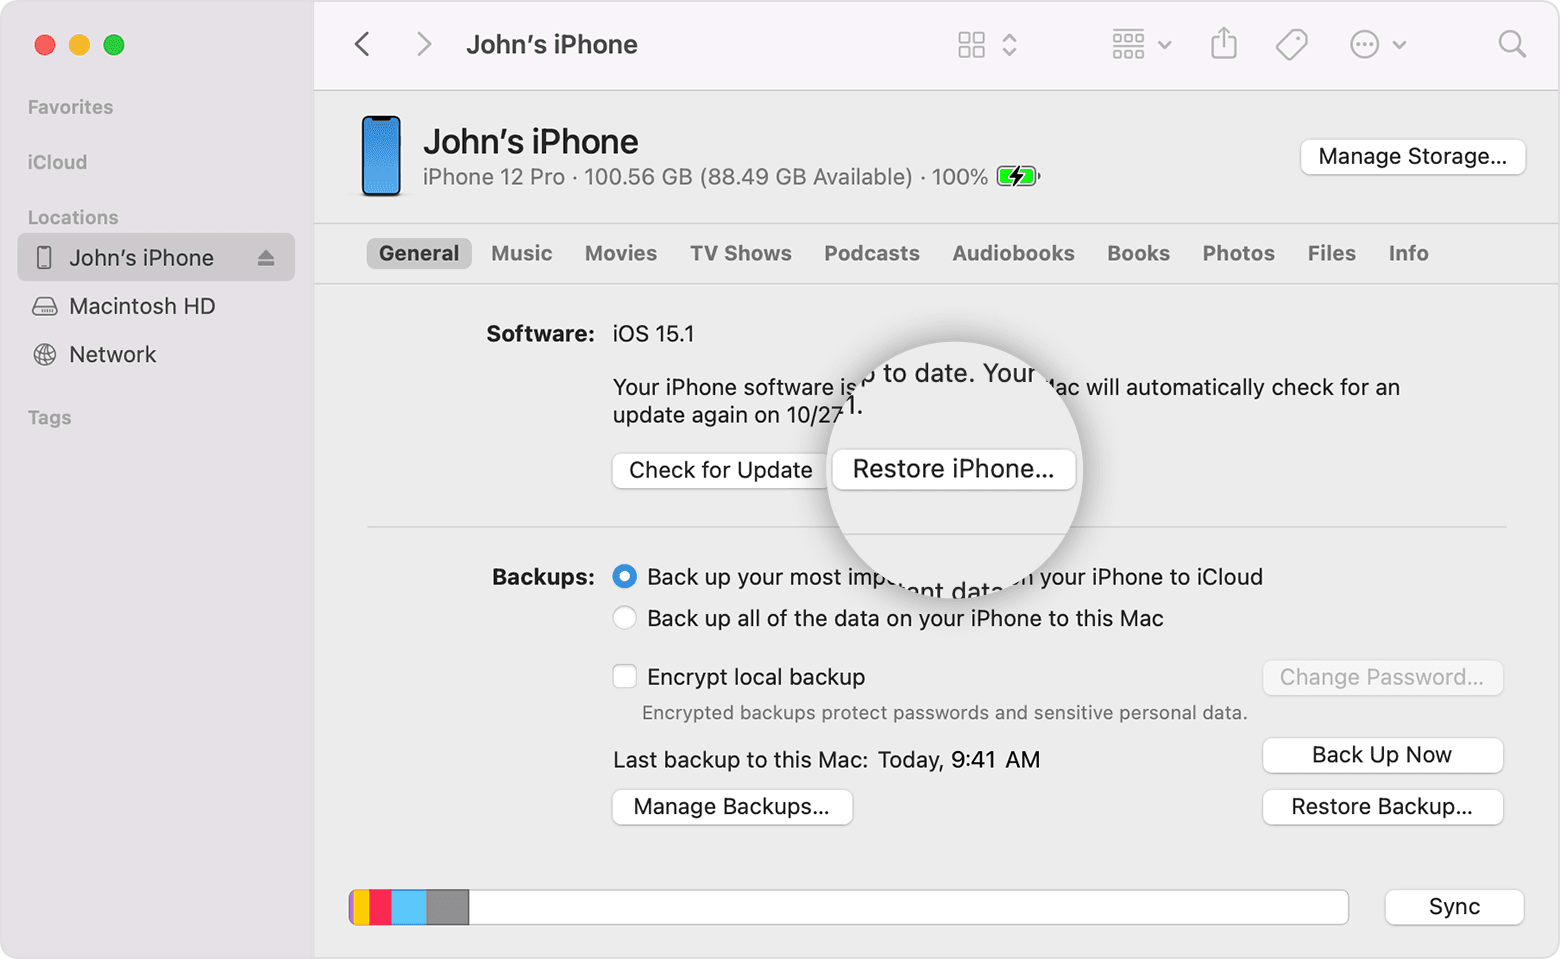
2.3 Update iOS Using Recovery Mode
If restoring your iPhone doesn’t resolve the issue, you can try updating iOS using recovery mode (This method installs the most recent version of iOS without deleting your data.).
To enter recovery mode, connect your iPhone to a computer, launch iTunes or Finder, and then restart your device by pressing and holding the power button. After selecting your iPhone in iTunes or Finder, click “Check for Update” and follow the on-screen directions to download and install the most recent iOS update.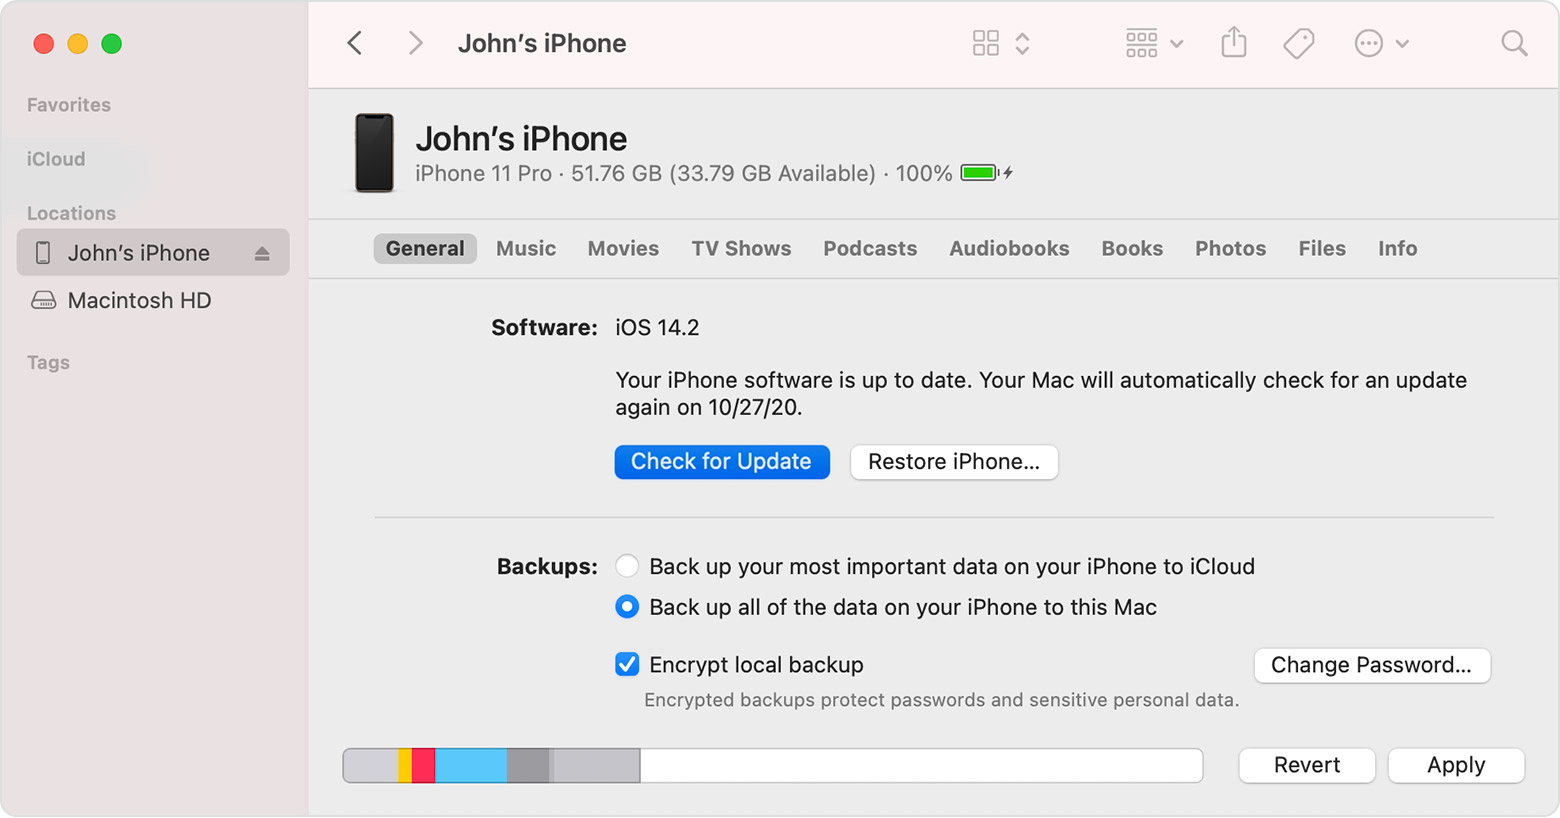
3. Advanced Fix: Resolve iPhone System Issues with AimerLab FixMate
If none of the above methods work, or if you want to avoid the risk of losing data, you can use an advanced tool like AimerLab FixMate to fix your iPhone. AimerLab FixMate is a powerful software designed to resolve various iPhone system issues, including being stuck in swipe up to recover, boot loops, and more, without data loss. AimerLab FixMate is compatible with all iPhone models and iOS versions, and it’s easy to use, even for those who are not tech-savvy.
Here are the steps on how to use AimerLab FixMate to fix iPhone stuck in swipe up to recover mode:
Step 1: Click the download button below to get the FixMate installer file, and then install it on your computer.
Step 2: Plug in your iPhone to your computer using a USB cable, FixMate will instantly identify your device and show you the model and iOS version in user interface.
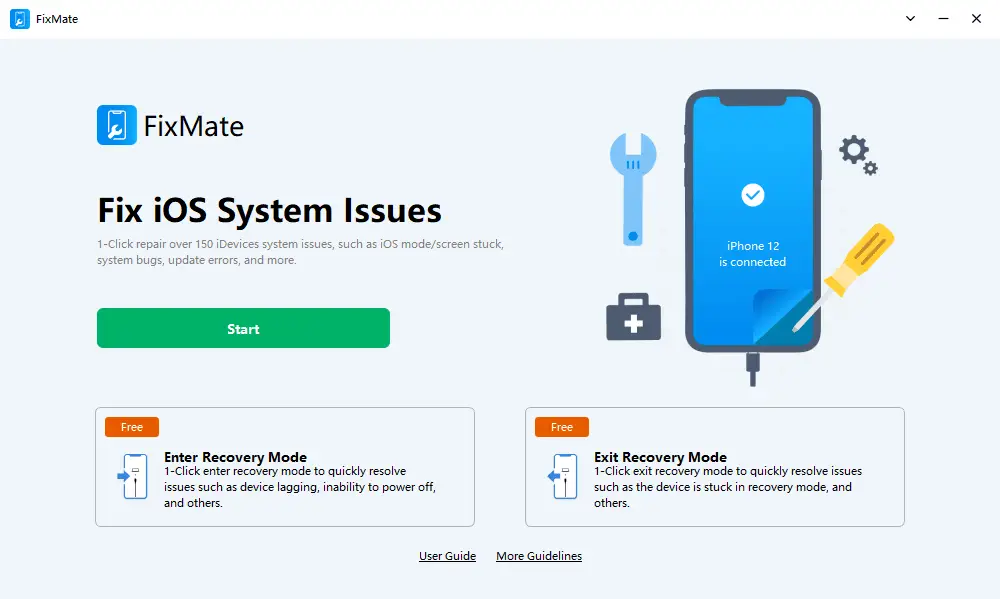
Step 3: Pick “Fix iOS System Issues” from the main menu, and then choose “Standard Repair” to start the repair process.
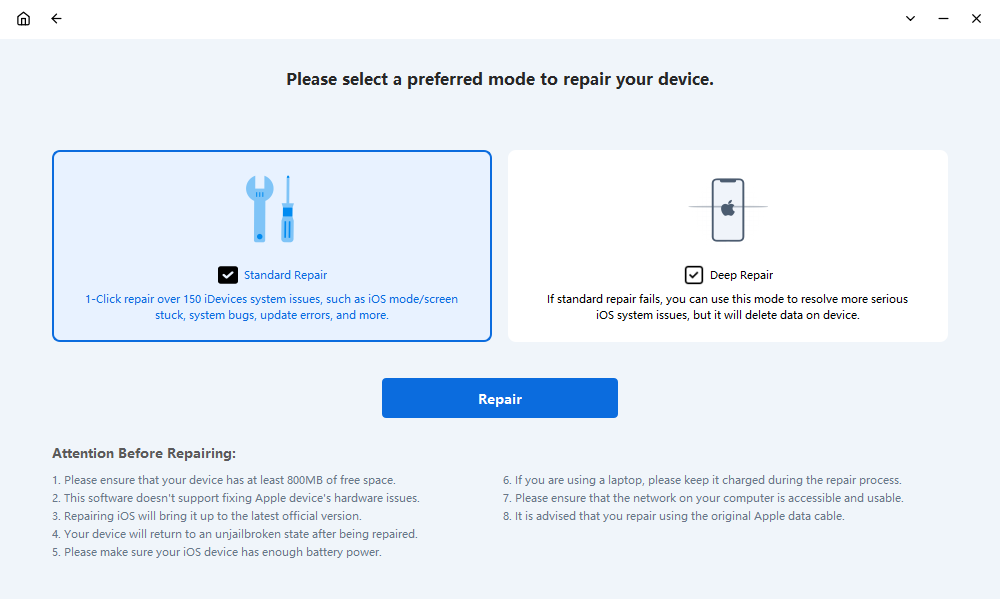
Step 4: FixMate will inform you to download the latest firmware, and you’ll need to click the “Repair” button to start the process.
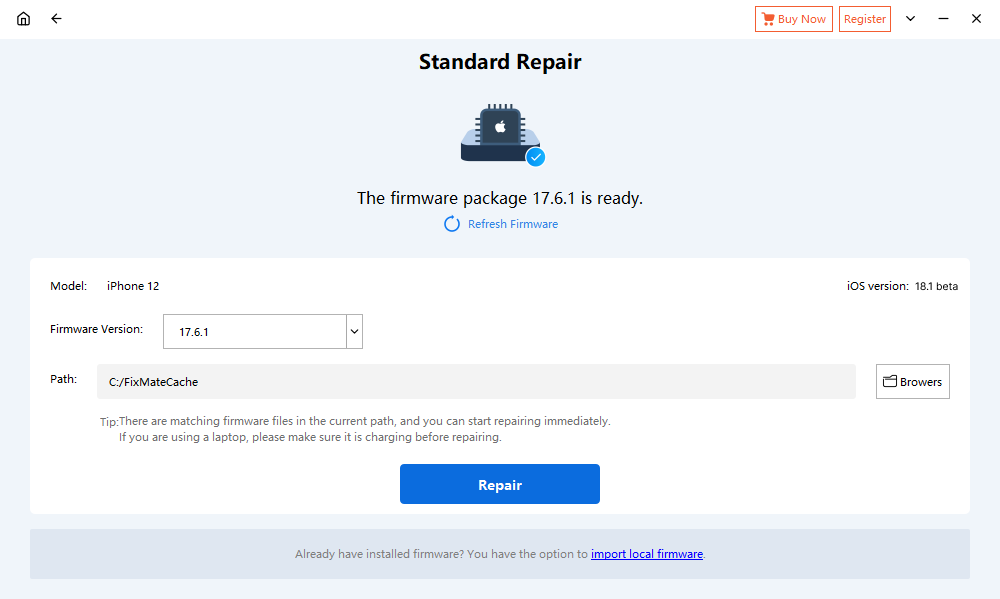
Step 5: When you’re ready to start fixing your iPhone, just choose “Start Repair” after downloading the firmware.
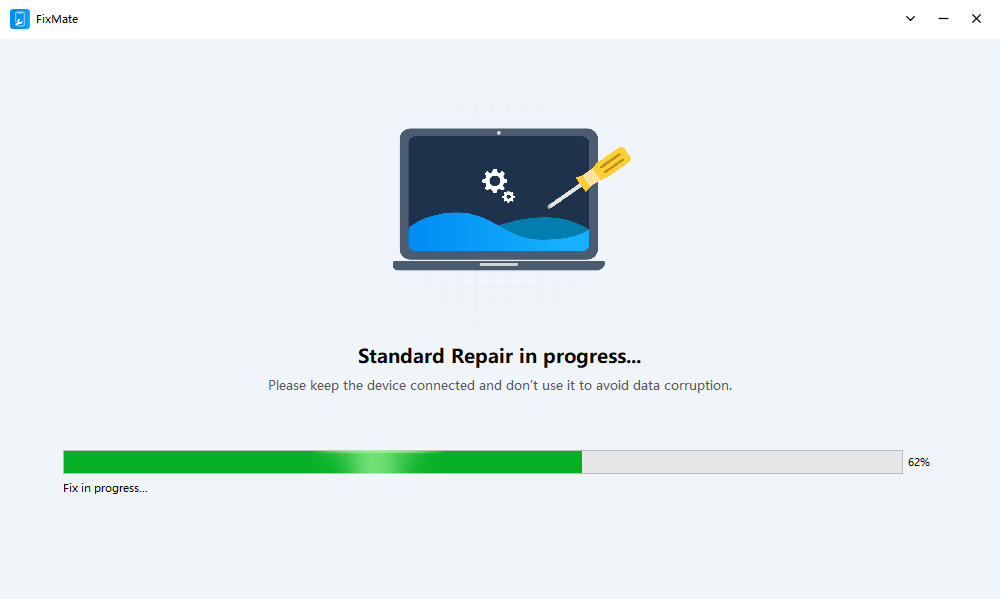
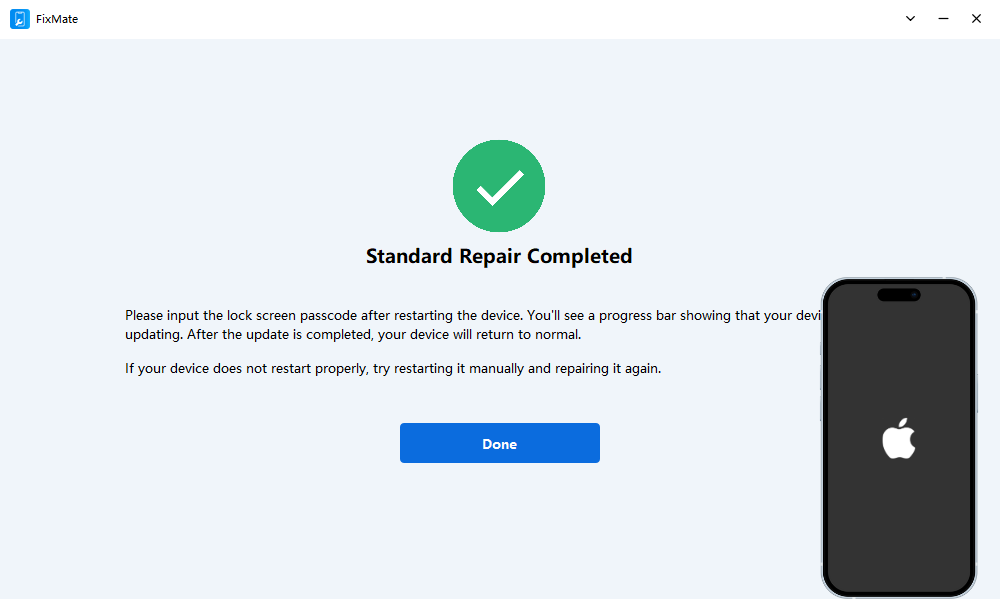
Step 6: Your iPhone will go through a restart once the process is complete, and it will continue to operate normally after that.
4. Conclusion
Getting stuck on the “Swipe Up to Recover” screen can be frustrating, but with the right approach, you can resolve the issue and get your iPhone back to normal. Start with simple methods like force restarting your device or restoring it through iTunes or Finder. If these methods don’t work or if you want to avoid data loss, AimerLab FixMate offers a powerful and user-friendly solution to fix iPhone system issues. With its one-click repair feature, compatibility with all iPhone models, and no data loss, AimerLab FixMate is highly recommended for resolving iPhone problems.
- Why Does My iPhone Screen Keep Dimming?
- iPhone Keeps Disconnecting from WiFi? Try These Solutions
- Methods for Tracking Location on a Verizon iPhone 15 Max
- Why Can’t I See My Child’s Location on iPhone?
- How to Fix iPhone 16/16 Pro Stuck on Hello Screen?
- How to Resolve Work Location Tag Not Working in iOS 18 Weather?


